Complete guide
Pizza Dough: The Complete Guide
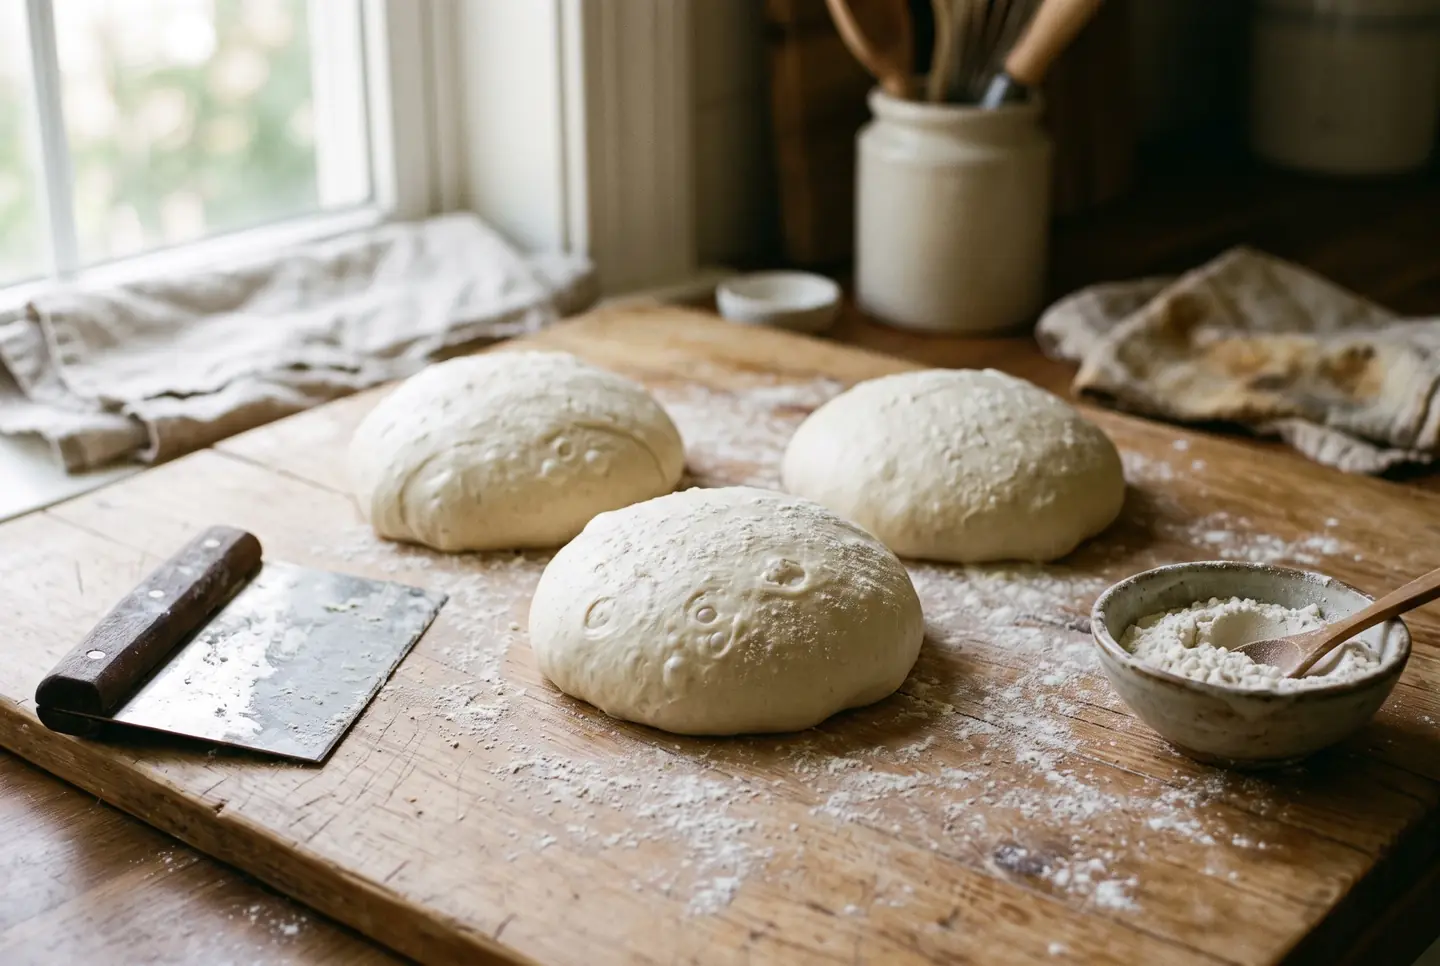
Pizza dough is four ingredients: flour, water, salt and yeast. That is the whole list, and it is exactly why it trips so many people up. When there is nothing to hide behind, every choice you make shows up in the crust. The dough that came out tough, or bland, or gummy on the bottom did not fail because you were missing a secret ingredient. It failed on one of a handful of decisions: how much water went in, how long it fermented, and how hot the surface was when the dough hit it.
This guide is built around those decisions. It starts with the base formula in baker's percentages, the same language a pizzeria uses, then works outward to hydration, fermentation, flour, shaping and the bake. The single hardest part of making pizza at home is not the dough at all. It is the oven, because a home oven runs at roughly half the temperature a pizzeria floor does, and that gap is the reason a home pie so often comes out pale and soft on the base. We spend real time on how to close it.
One promise before we start. By the end you will be able to look at your last disappointing pizza and name the reason, because every common failure here has a cause you can point to, not bad luck.
The pizza dough: the base formula in baker's percentages
A pizza dough is a lean dough: flour and water, plus a little salt and a little yeast, and sometimes a spoon of oil depending on the style. The trick that makes it repeatable is baker's percentage, where flour is always 100% and everything else is written as a share of the flour weight. Once you think this way, you can scale to any number of pizzas and any ball size without redoing the math, and you can compare two recipes at a glance. If you want to see every ingredient worked out this way, our guide to the full baker's percentage formula, scaled to any batch walks through the math from a single ball to a party's worth of dough.
Here are the two workhorse formulas, side by side. The New York style leans on bread flour and a little oil; the Neapolitan style is barer and wetter and bakes far hotter.
| Ingredient | New York style | Neapolitan style |
|---|---|---|
| Flour | 100% | 100% |
| Water | 62% | 60-62% |
| Salt | 2% | 2.5-3% |
| Instant yeast | 0.5% (same day) or 0.1% (cold ferment) | 0.1-0.2% |
| Oil | 2-3% | none |
These New York numbers follow a classic home formula: 62% hydration, 2% salt, 3% oil and 0.5% instant yeast, built on bread flour of 13 to 14% protein. The Neapolitan column follows the classic hand-stretched formula, which per the AVPN standard uses no oil, runs 55 to 62% hydration and takes a very small dose of yeast.
To turn a formula into a shopping list, pick a ball weight and a number of balls. A generous 12 inch New York ball is about 280 grams; a Neapolitan ball is nearer 250 grams. Multiply, then split by percentage. For four 280 gram New York balls (1,120 grams of dough), the flour works out to about 675 grams, water to 420 grams, salt to 13 grams, yeast to 3.4 grams and oil to 20 grams. Weigh everything in grams. Cups measure volume, and a cup of flour can vary by a third depending on how you scoop, which is enough to move your hydration by ten points without you touching the water.
Mixing is simple: dissolve the salt in the water, add the flour and yeast, and bring it together until there is no dry flour left. Rest it ten minutes, then knead just until smooth, or use a series of folds over the first hour. What actually builds the dough is time, not muscle, which is the whole point of the next two sections.
Tipo 00 flour: what changes and when it matters
Tipo 00 is an Italian grind designation, not a protein rating. The number refers to how finely the flour is milled: 00 is the finest, talcum soft, with almost no bran. That fine grind is why a Neapolitan crust opens into that tender, pillowy rim. What people get wrong is assuming 00 is automatically the right flour for every pizza. It is not.
The two things that actually matter are protein and absorption, and they do not always move together. A pizza 00 like Caputo is milled fine but still carries enough protein for a strong dough. A generic supermarket 00 sold for cakes is fine and low in protein, and it will give you a slack, tearing dough. Bread flour, by contrast, is coarser but high in protein, and it drinks more water.
| Flour | Typical protein | Approx. absorption | Best for |
|---|---|---|---|
| Pizza 00 (e.g. Caputo) | 12-13% | 55-57% | Neapolitan, hot and fast bakes |
| Bread flour | 13-14% | around 62% | New York, pan, longer bakes |
| All-purpose | 10-11.5% | 58-60% | works, with a softer, less chewy result |
The absorption figures matter more than they look. Because 00 takes on less water (around 55 to 57%) than bread flour (around 62%), you cannot swap one for the other at the same hydration and expect the same dough. Move from bread flour to 00 without dropping the water and your dough turns soupy. The rule of thumb: 00 shines when the oven is genuinely hot and the bake is under a couple of minutes, because its fine crumb and lower absorption reward that fast blast. In a standard home oven that tops out around 250 to 290C, bread flour is often the more forgiving choice, and we will come back to why in the oven section. For the deeper dive, including which Caputo line to buy and how 00 behaves in a home oven, we have a whole page on the flour question.
Dough hydration: from 55% to 75%
Hydration is the water weight as a percentage of the flour weight, and it is the single dial that changes your dough the most. Low hydration gives a firm, easy dough and a crisp, tighter crust. High hydration gives a slack, sticky dough and a lighter, more open crumb. Neither is better; they are different pizzas, and they ask for different handling.
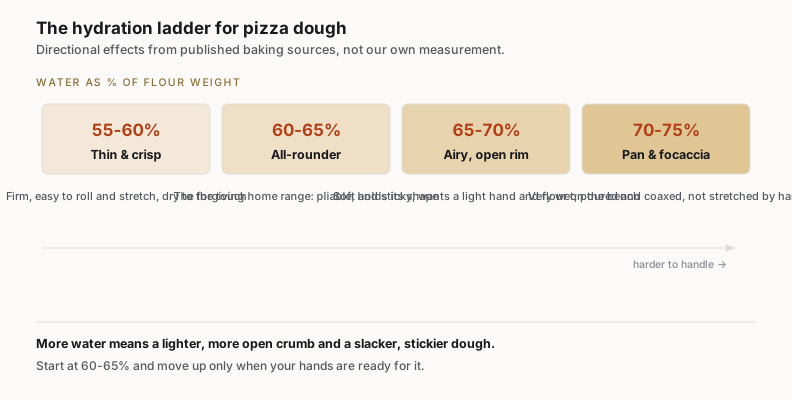
The ladder above is the map. For a first pizza, start at 60 to 65%. It is the range that forgives: pliable enough to stretch, firm enough to hold its shape, dry enough not to weld itself to your hands. As your hands get more confident, move up. A 70% dough will reward you with bigger holes and a crispier, lighter crust, but it will also fight you on the bench, and it needs flour under it and a light touch.
| Hydration | Handling | Result | Typical use |
|---|---|---|---|
| 55-60% | Firm, easy | Crisp, tight, sturdy | Thin crust, cracker style |
| 60-65% | Pliable, forgiving | Balanced, chewy | The all-purpose home range |
| 65-70% | Soft, tacky | Airy, open rim | Neapolitan leaning, higher heat |
| 70-75% | Slack, sticky | Very open, light | Pan pizza, focaccia, Detroit |
A practical note that saves a lot of grief: the wetter the dough, the more the oven has to do quickly. A very high hydration dough on a cool surface is a recipe for a wet, gummy base, because there is more water to drive off and not enough heat to do it. If your oven is not hot, do not chase 75%. Match the hydration to the heat you actually have.
To go further, our page on choosing pizza dough hydration for your oven walks through every range and how to handle a wetter dough without a mess.
Cold fermentation: 8h, 24h and 72h
Fermentation is where flavor comes from, and cold fermentation is the home baker's best trick. The idea is simple: mix the dough with a very small amount of yeast, then park it in the refrigerator for one to three days. The cold slows the yeast to a crawl, so the dough matures slowly without over-rising, and enzymes in the flour keep breaking starch into sugars the whole time. Those sugars are what give a long-fermented crust its faint sweetness and its deep, blistered browning.
The lever you pull is the yeast dose. For a same-day dough you use a normal amount, around 0.5% instant yeast, and let it rise a few hours warm. For a cold ferment of one to three days, you drop the yeast to roughly 0.1 to 0.2%, because it has far more time to do its work.
| Schedule | Instant yeast | Where | Flavor | Notes |
|---|---|---|---|---|
| Same day (4-6h) | around 0.5% | Warm room | Clean, mild | Fast, convenient |
| 24h cold | around 0.2% | Fridge | Noticeably deeper | A good weeknight target |
| 48h cold | around 0.1-0.15% | Fridge | Complex, sweet | Many bakers' sweet spot |
| 72h cold | around 0.1% | Fridge | Peak complexity | Handle gently, gluten softens |
Published cold-ferment recipes converge on the same picture: 24 hours is good, 48 hours is better for flavor, and 48 to 72 hours reaches peak complexity with a subtle sweetness. Push much past 72 hours and it turns the other way: the dough starts to taste sour and the gluten weakens, so the crust gets fragile. Take the dough out of the fridge an hour or two before you bake so it comes to room temperature, or it will fight the stretch and shrink back.
For the full method, our page on cold fermenting pizza dough in the fridge sets the yeast dose for every schedule from 24 to 72 hours.
Poolish and biga for pizza
Poolish and biga are preferments: a portion of the flour and water fermented ahead of time, then mixed into the final dough. They are two paths to the same goal, a deeper flavor and a more extensible dough, and they differ mainly in hydration. A poolish is a loose, 100% hydration batter of equal parts flour and water plus a pinch of yeast. A biga is a stiff preferment, usually around 45 to 50% hydration, closer to a shaggy dough.
You mix the preferment and leave it at room temperature until it is bubbly and domed, then just starting to fall, which for a poolish is often a number of hours depending on the room. Then it goes into the rest of the flour, water, salt and a little more yeast. The payoff is real: a preferment builds aroma and an open, extensible crumb that a straight dough struggles to match in the same time. Poolish tends to give a lighter, airier result and is the friendlier of the two for a first try. Biga gives a stronger, chewier structure and is traditional in a lot of Italian pan pizza. Neither is required for a good pizza, but if you have made the base recipe a few times and want to level up flavor without buying anything, a poolish or a biga is the next step.
Balling and maturing in a box
After the bulk rise, the dough is divided into individual balls, and how you shape those balls matters more than it seems. A tight, smooth ball with surface tension will hold its round shape and open evenly. A loose, badly folded ball will slump and tear. To ball, cut a piece to weight, then fold the edges into the center and flip it seam side down, dragging it in small circles on an unfloured patch of counter to build a taut skin.
Then the balls rest, and this second rise is called the proof. Space them out in a lidded container or a proofing tray with room to spread, because they will relax and widen. This is where a dough box earns its place: it keeps the balls from drying into a skin and lets them proof in their own humid microclimate. If you do not have one, a rubbed-oil sheet pan under a second inverted pan works. Give the balls enough time at room temperature to become soft and jiggly, puffed and relaxed, not tight. A ball that is still tense will snap back the moment you try to open it. A properly proofed ball opens like it wants to.
Opening the disc without a rolling pin
Put the rolling pin away. A rolling pin crushes the gas out of the rim, and the rim, the cornicione, is where a good crust lives. You open a pizza with your hands, not a rolling pin, and the goal is to move the dough outward while leaving a puffed border untouched.
Start by flouring the ball and the bench well. Press the center flat with your fingertips, working from the middle out and leaving the outer inch alone. Once you have a rough disc, lift it and let gravity help: drape it over your knuckles and let the weight of the dough stretch itself as you rotate. Keep the edge thicker. If the dough resists and springs back, it is telling you it needs a few more minutes of rest, so set it down, cover it, and come back. Fighting a tight dough only tears it. A well-matured, well-proofed ball opens to a full disc in under a minute with almost no force, which is the whole reward for getting the fermentation and the proof right.
Sourdough pizza dough
You can drive pizza dough with a sourdough starter instead of commercial yeast, and for a lot of people it is the best pizza they make. The flavor is more complex, a gentle tang under the wheat, and the long, slow fermentation that sourdough demands lines up perfectly with the cold-ferment approach that already suits pizza.
The swap is not one for one. Instead of a fraction of a percent of instant yeast, you build in a portion of active, ripe starter, commonly around 15 to 20% of the flour weight, and then give the dough a long fermentation to account for the slower, gentler rise a starter provides. The starter needs to be lively, fed and at its peak, or the dough will drag. Because the starter also brings acidity, which strengthens then eventually weakens gluten, the timing window matters more than with commercial yeast. Sourdough pizza is its own topic with its own schedule, and it deserves the full walk-through in its dedicated guide; the short version is that it is the same dough thinking, with a living leaven in place of the packet.
Gluten-free dough that isn't a cracker
Gluten-free pizza has a bad reputation for a fair reason: most versions come out as a thin, brittle cracker, because gluten is exactly the protein that gives dough its stretch and its chew, and taking it out removes the structure. The fix is not to find a flour that behaves like wheat, because none does. The fix is to rebuild the structure another way.
That means a blend of gluten-free flours and starches rather than a single flour, plus a binder that mimics what gluten did. Psyllium husk is the workhorse here: it forms a gel that traps gas and gives the dough something to stretch, turning a batter into something you can actually shape. Xanthan gum plays a similar role in many blends. Gluten-free doughs also run wetter and behave more like a thick batter than a kneadable dough, so they are often spread rather than stretched, and they reward a hot surface that sets the base fast. The honest expectation: a good gluten-free pizza is genuinely good, with a real chew, but it is its own thing, not an imitation of a wheat crust. Chase that and you will be happy; chase a perfect copy and you will not.
For the full method, our page on gluten-free pizza dough that bends instead of snapping sets the psyllium ratio, the hydration and the rest that keeps the crust from baking to a shard.
Same-day dough, when time is short
The cold ferment gives the best flavor, but not every pizza night comes with two days of warning. A same-day dough is entirely respectable, and the only real change is that you use more yeast to get the rise done in hours instead of days. Around 0.5% instant yeast, or a bit more in a cool kitchen, will take a dough from mix to ready in roughly four to six hours at room temperature.
What you trade is depth. A four hour dough tastes clean and a little plain next to a 48 hour one, because the enzymes have not had time to build up those sugars and aromas. You can claw some of it back with warmth, which speeds fermentation, and with a small pinch of the base formula's oil, which keeps the crumb tender. The other honest option is a hybrid: mix in the morning, let it rise warm for a couple of hours, then refrigerate until evening. Even a half day of cold does audible work on the flavor. Same-day dough is the answer to "I want pizza tonight and did not plan ahead," and it is a perfectly good answer.
For the full method, our page on same-day pizza dough for when time is short sets the yeast dose and the warm-rise timing that get a dough from mix to ready in an afternoon.
Home oven: how to get close to 450C
Here is the hard truth that most recipes skate past. A true Neapolitan pizza bakes on a floor of around 430 to 480C and is done in 60 to 90 seconds, per the official Neapolitan pizza association standard. A home oven maxes out at roughly 250 to 290C (500 to 550F). That is not a small gap. It is the single biggest reason a home pizza comes out pale, soft-bottomed and disappointing next to a pizzeria's, and no dough recipe on earth closes it by itself. You close it with the surface and the technique.
The lever is thermal mass and conductivity: how much heat the baking surface holds, and how fast it dumps that heat into the dough. Your oven air might be 260C, but a bare rack or a cold sheet pan barely conducts, so the base cooks slowly while the top races ahead. A preheated, heavy surface fixes this by hitting the raw dough with a wall of stored heat the instant it lands. This is the project's whole argument about home ovens, and it is worth a table.
| Surface | How it behaves | Preheat | Bake at 500-550F | Verdict |
|---|---|---|---|---|
| Bare rack or cold sheet | Almost no stored heat; base cooks slowly | none | slow, pale base | Avoid for pizza |
| Pizza stone | Holds heat, transfers it slowly | 60-75 min | 8-10 min | Good, forgiving, can crack from shock |
| Baking steel | Holds heat, transfers it fast | 45-60 min | 5-7 min | Best home option, nearly indestructible |
Steel conducts heat about 18 times more efficiently than stone, which is why a steel at 500F mimics what a stone floor does in a much hotter oven: it moves heat into the base fast enough to crisp it before the top overcooks. Whichever surface you use, the preheat is not optional. A steel needs a full 45 to 60 minutes to saturate its core with heat, and it should come within about 20F of your oven's set temperature before you launch. Skip the preheat and even the best surface is just a cold plate.
The second lever, and the one that genuinely transforms a home pizza, is the broiler. Your broiler throws intense radiant heat from above, the same kind of overhead blast a pizza oven gives. Preheat your steel high, near the top of the oven, then switch to the broiler a few minutes before you launch. Steel below, broiler above, and you get leopard-spotted char on the rim and a bake time under five minutes. It is the closest a standard home oven gets to the real thing, and it costs nothing. For the full method, surface by surface, our guide to pizza in a home oven walks through the preheat, the steel-versus-stone call and the broiler step by step.
The base won't cook: diagnosis
A raw, gummy, or pale bottom is the most common home pizza failure, and it is almost always a heat problem, not a dough problem. Run down this list in order, because the top causes are far more common than the bottom ones.
| Symptom | Most likely cause | Fix |
|---|---|---|
| Pale, soft base, cooked top | Surface too cool or not preheated | Use a preheated steel or stone, full preheat, launch high in the oven |
| Gummy, wet base | Too much water for the heat; sauce too wet | Drop hydration or heat the surface more; drain the sauce, use less |
| Base burns before top cooks | Surface too hot relative to the top | Move down a rack, or finish under the broiler to catch the top up |
| Soggy after it leaves the oven | Cut and stacked while steaming | Cool a minute on a rack so steam escapes the base |
| Sticks and tears on launch | Not enough flour or semolina on the peel | Dust the peel, work fast, give the peel a shake before you commit |
The single most effective change for a pale base is almost never the dough. It is preheating a proper surface and using the broiler, which brings us right back to the oven section: get the heat right and most base problems disappear on their own. When yours still won't cook, the fix-it guide for a pizza not cooking on the bottom runs through every cause in order.
Frequently asked questions
Do I need 00 flour to make good pizza? No. 00 flour shines in a very hot, very fast bake, which most home ovens cannot reach. In a standard home oven, bread flour is often the more forgiving choice and gives a great crust. Use 00 if you have a hot setup and want a Neapolitan style; otherwise bread flour is a fine default.
What hydration should a beginner use? Start at 60 to 65%. It is firm enough to handle without sticking to everything and forgiving enough to stretch without tearing. Move higher only once opening a disc feels easy, because wetter dough is harder to handle and demands a hotter surface.
How long can pizza dough stay in the fridge? One to three days is the sweet spot, with flavor peaking around 48 to 72 hours. Past 72 hours the dough starts to taste sour and the gluten weakens, so the crust gets fragile. Always let it come back to room temperature for an hour or two before shaping.
Why is my pizza base soft and pale? Almost always the baking surface was too cool or not preheated long enough. A home oven's air heat alone will not crisp a base. Preheat a steel or stone fully, bake high in the oven, and finish under the broiler.
Can I make pizza dough the same day? Yes. Use about 0.5% instant yeast and let it rise warm for four to six hours. You lose some of the depth a long cold ferment builds, but the pizza is still very good, especially with a warm rise and a touch of oil in the dough.
Should I use a rolling pin to open the dough? No. A rolling pin presses the gas out of the rim and gives you a flat, dense edge. Open the dough by hand, pressing from the center out and leaving the outer border untouched, so the rim can puff in the oven.
Why does my dough spring back and refuse to stretch? The gluten is still tight, which means the dough needs more rest. Cover it, wait ten to fifteen minutes, and try again. A properly proofed, matured ball opens with almost no resistance; if it is fighting you, it is not ready.
Stone or steel for a home oven? Steel, if you are buying one. It conducts heat far faster, so it crisps the base better at home-oven temperatures and preheats quicker. A stone works and costs less, but it is slower and can crack from thermal shock. Either beats a bare rack by a wide margin.
Pizza is a lifetime hobby that starts paying off on the first good pie. Get the formula, the hydration and the ferment right, then put real effort into the heat, and a home oven will hand you a crust you will be proud of. Everything after that is just reps, and the reps are the fun part.
Where I checked
Keep reading
 Guide
Guide
Bagel Dough: Why It Is So Firm, and How to Knead It
Bagel dough feels stiff and dry on purpose. Here is why it runs at 50 to 60% water and high protein flour, how to knead it, and the windowpane to aim for.
6 min read Guide
Guide
Bagel Recipe: New York Style, Step by Step
A weight-based New York bagel recipe, step by step: the firm 58% dough, an overnight cold retard, how long to boil, and the oven heat that sets a glossy crust.
6 min read Complete guide
Bagels: The Complete Guide
Make a real bagel at home: the firm 58% dough, why bagels are boiled before baking, New York vs Montreal, sourdough and gluten free, and how to fix flat ones.
18 min read