Guide
How to Ball Pizza Dough (and Proof It in a Box)
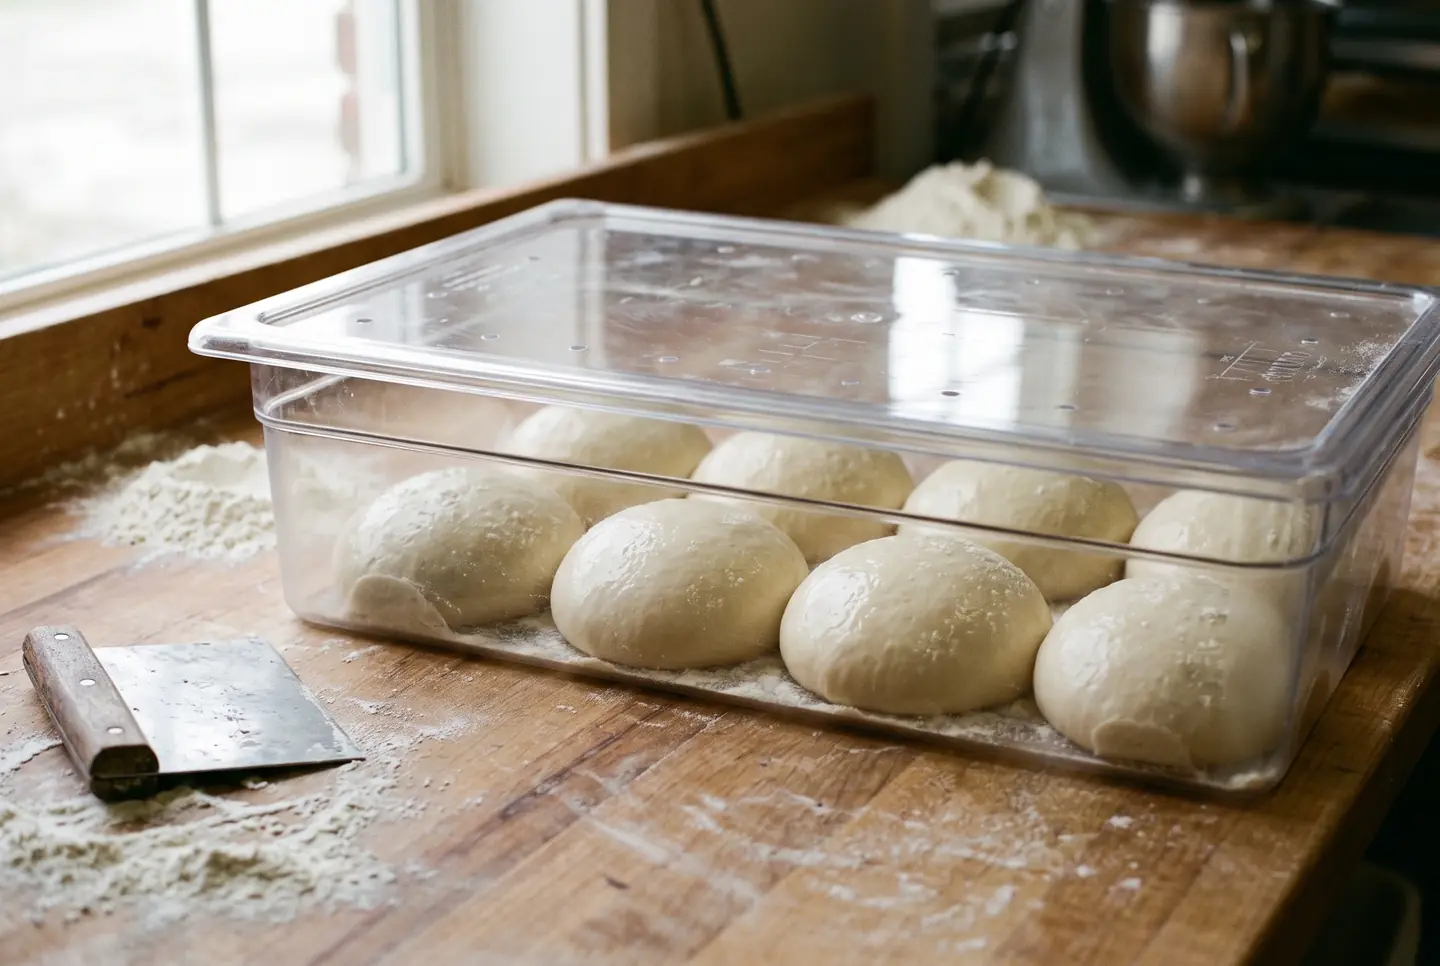
To ball pizza dough, divide it into equal pieces by weight, then shape each one into a tight, smooth ball by folding the edges into the center and dragging it seam side down on the counter to build surface tension. Rest the balls, seam down and spaced apart, until they are puffed and relaxed. That tension is the whole point: a taut ball holds its round shape and opens evenly, while a loose, badly folded one slumps, sticks, and tears when you try to stretch it.
Balling happens after the bulk rise and before the final proof, and it is a step people rush. It is worth slowing down for, because how you ball the dough now decides how it opens later. This is one part of the complete pizza dough guide; here we stay on the balling and the proof, so your rounds open like they want to.
Divide by weight, not by eye
Cut the dough into pieces of equal weight on a scale. Even portions proof at the same rate and bake into pizzas of the same size, and eyeballing it is exactly how you end up with one giant and one runt. Use a bench scraper for a clean cut rather than tearing, which damages the gluten.
How heavy each ball should be depends on the pizza you want:
| Style | Typical ball weight | Rough finished size |
|---|---|---|
| Neapolitan | 250 to 280 g | 11 to 12 inch |
| New York | 280 to 350 g | 13 to 16 inch |
| Personal / small | 180 to 220 g | 9 to 10 inch |
| Pan / in teglia | scaled to the tray area | fills the pan |
These are common working weights, not rules; a Neapolitan ball runs around 250 to 280 grams, within the 200 to 280 gram range the official Neapolitan standard sets for a 22 to 35 cm pizza (AVPN), and a New York ball is a little heavier for its wider base (Gozney). Pick a weight, write it down, and repeat it, so you can learn how your oven handles that size.
The fold-and-drag: building surface tension
The goal is a smooth, taut skin on top with the seam sealed underneath. There are two reliable ways to get there.
- Fold and round. Take a cut piece and fold its edges up and into the center, several tucks around, so the top stretches tight. Flip it seam side down.
- Drag to tension. Cup your hand around the ball and drag it in small circles on an unfloured patch of counter. The slight grip of the bare surface pulls the skin taut and closes the seam. A floured bench cannot grab, so the ball just slides and never tightens.
- Check the skin. A finished ball is smooth and domed on top, with no seam or wrinkle showing, and it should feel tense, not slack. If it looks pruny or seamed, round it once more.
If you prefer, you can also pinch the dough closed: gather the mass on top, rotating and pinching the seam until the bottom is sealed and the top is completely smooth (Gozney). Either method works. What matters is the taut skin and the sealed seam, not the exact choreography.
Proofing the balls: the second rise
Once balled, the dough needs a second rise, the proof, so the gluten relaxes and the balls fill with gas. Set them seam side down in a lidded container, well spaced, because they spread as they relax and balls that touch will fuse and tear when you separate them. Lightly oil the container so they release cleanly.
A ball is ready to open when it is soft, puffed, and jiggly, and it has widened and slackened from the tight round you made. A ball that is still tense and springy has not proofed enough and will snap back the moment you stretch it. At room temperature this typically takes a few hours, though the exact time depends on your dough, your yeast, and the warmth of the kitchen, so judge by feel, not the clock.
Why a dough box earns its place
A dough box is a wide, shallow, lidded tray built for exactly this. It gives the balls room to spread, and the lid keeps them in a humid microclimate so they do not dry into a tough skin on top. That skin is the enemy of a good open: it resists stretching and shows up as a leathery patch on the baked crust.
You do not have to buy one. A large lidded food container works, and so does an oiled sheet pan covered by a second inverted pan, which traps the moisture the same way. What you want to avoid is a loose cloth or open air, which lets the tops dry out, and cramming the balls together, which makes them fuse.
Room temperature or the fridge?
You can proof the balls warm on the counter or cold in the fridge, and each has a place. A room temperature proof of a few hours is the straightforward route for baking the same day. A cold proof in the fridge, from overnight up to a couple of days, buys flavor and fits your schedule, and it is covered in the cold ferment method. Whichever you choose, ball the dough before it goes cold: a single mass of chilled dough is stiff and stubborn to divide and round, while individual balls warm up evenly and are ready to open. If you cold-proof, take the balls out and let them come toward room temperature before you stretch.
Frequently asked questions
How do you ball pizza dough? Divide the dough into equal pieces by weight, fold each piece's edges into the center to tighten the top, flip it seam down, and drag it in small circles on an unfloured counter to build surface tension and seal the seam. Rest the balls, spaced apart, until puffed and relaxed.
How much should a pizza dough ball weigh? It depends on style. A Neapolitan ball is around 250 to 280 grams, within the 200 to 280 grams the official Neapolitan standard allows (AVPN); a New York ball is a little heavier; and a personal pizza is around 180 to 220 grams. Pick one weight and repeat it so you learn your oven.
Why do you drag the ball on an unfloured surface? The bare counter grips the dough, and that grip is what pulls the skin taut and closes the seam. A floured bench lets the ball slide, so it never builds tension and stays loose.
How long do you proof pizza dough balls? Until they are soft, puffed, and jiggly rather than tight and springy. At room temperature that is usually a few hours, but it varies with the dough and the warmth of the room, so go by feel.
Should I ball the dough before or after the fridge? Before. Divide and ball first, then chill each in its own space. A single cold mass is hard to divide and round, while individual balls warm up evenly and open cleanly.
Balling is quiet work that pays off loudly. Spend the extra minute to round each ball tight and let it proof until it is soft, and the dough will reward you by opening to a full disc with almost no fight, which is exactly what you want when the oven is hot and the toppings are waiting.
Where I checked
Keep reading
 Guide
Guide
Bagel Dough: Why It Is So Firm, and How to Knead It
Bagel dough feels stiff and dry on purpose. Here is why it runs at 50 to 60% water and high protein flour, how to knead it, and the windowpane to aim for.
6 min read Guide
Guide
Bagel Recipe: New York Style, Step by Step
A weight-based New York bagel recipe, step by step: the firm 58% dough, an overnight cold retard, how long to boil, and the oven heat that sets a glossy crust.
6 min read Complete guide
Bagels: The Complete Guide
Make a real bagel at home: the firm 58% dough, why bagels are boiled before baking, New York vs Montreal, sourdough and gluten free, and how to fix flat ones.
18 min read